ConfigMgr 2403 Baseline Installation: Step-by-Step Tutorial
Series Navigation:
- Part 1: SQL Server 2019 Installation Tutorial: Configuration Manager Database Preparation
- Part 2: Configuration Manager: Server Role Addition and Database Configuration Tutorial
- [Part 3: Configuration Manager Baseline Version Installation Tutorial (This Article)]
I. Introduction
In the previous two tutorials, we have completed the SQL Server 2019 database preparation (Link to Part 1) and ConfigMgr prerequisite configuration (Link to Part 2), resolving key issues such as server role addition, database collation settings, and ODBC driver installation. As the third article in this series, this article will focus on the actual installation process of the Configuration Manager baseline version.
II. Preparation: Obtain the Configuration Manager Baseline Installation Package
The core prerequisite for installing ConfigMgr is to obtain the baseline media installation package (Baseline Media) - this type of version contains complete installation files and does not depend on prerequisite updates, making it essential for new deployments. The key steps are as follows:
1. Download the Baseline Version Installation Media
Please refer to the Microsoft official documentation (Obtain Installation Media - Configuration Manager | Microsoft Learn) to download the baseline version, 2403 version (version 5.00.9128) - this is the currently available baseline version (marked as "Yes" in the "Baseline" column of the table below), suitable for new deployments.
2. Version Information (Including Baseline Marking)
According to Microsoft's official documentation, the current information related to baseline versions is as follows (pay special attention to the "Baseline" column):
| Version | Availability Date | End of Support Date | Baseline | In-console Updates |
|---|---|---|---|---|
| 2503 | March 31, 2025 | September 30, 2026 | No | Yes |
| 2409 | December 4, 2024 | June 4, 2026 | No | Yes |
| 2403 | April 22, 2024 | October 22, 2025 | Yes (Note 1) | Yes |
Note: Versions marked as "Yes" in the "Baseline" column (such as 2403) contain complete installation files and do not depend on other update packages, making them the preferred choice for new installations.
III. Installation Begins: Step-by-Step Illustrated Configuration Manager Deployment Process
1. Launch the Installer
Navigate to the extracted folder, locate the splash.hta file (ConfigMgr installation launcher), and double-click to open it.
Image Description: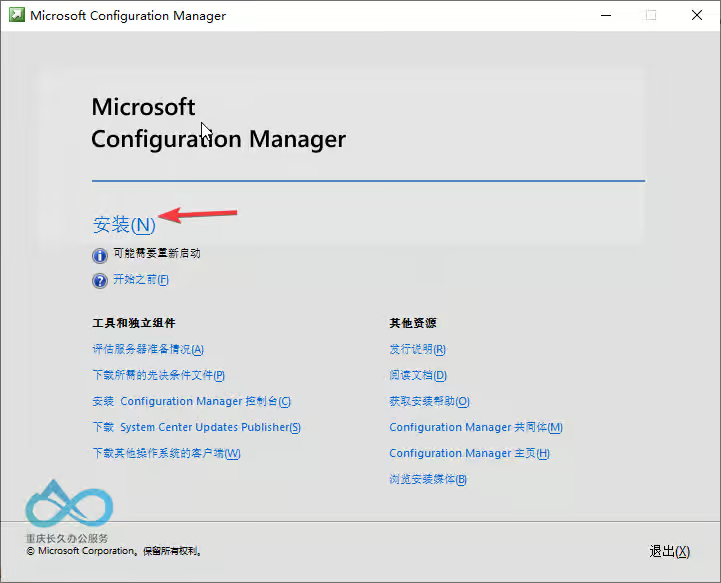
2. Select Installation Type: Typical vs Custom (Beginners Recommended to Choose Typical)
The installer will prompt you to select an "Installation Type", which is divided by default into Typical Installation and Custom Installation:
- Typical Installation: Automatically configures the database, site roles (management point, distribution point), etc., suitable for beginners to deploy quickly;
- Custom Installation: Allows manual adjustment of database instances, storage paths, role configurations, etc., suitable for experienced administrators.
This article selects: To demonstrate details, choose "Custom Installation" (if pursuing speed, beginners can directly check "Typical Installation" to skip subsequent configuration steps).
Image Description: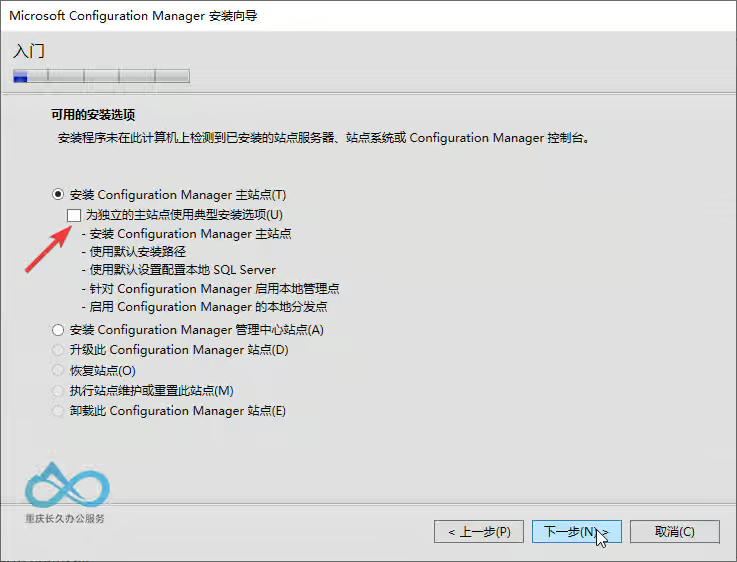
3. Select License Type: Evaluation Version (180-day trial)
ConfigMgr offers two choices: Evaluation Version and Official Version (Retail/Volume License):
- Evaluation Version: No activation required, can be used free for 180 days, suitable for testing or learning;
- Official Version: Requires entering a product key, used for production environments.
This article selects: Evaluation Version.
Image Description: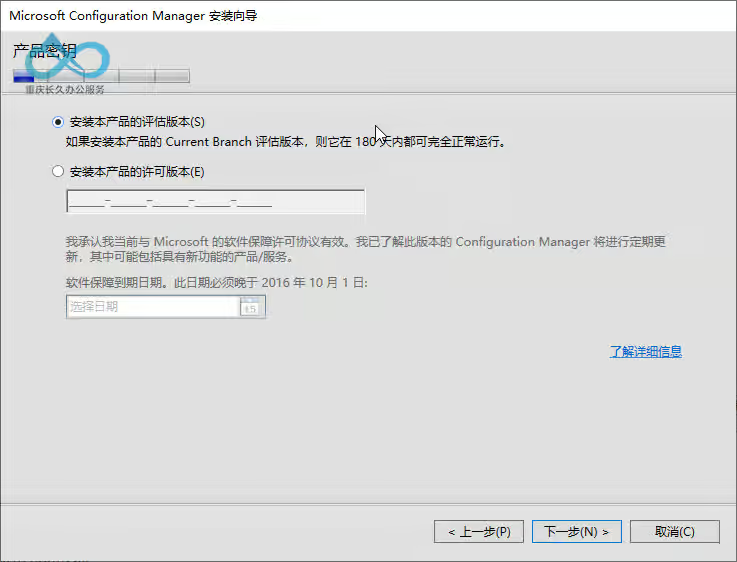
4. Accept License Terms (Must be checked)
After reading the Microsoft software license terms, check "I accept the license terms and conditions" and click "Next".
Note: If not checked, the installer will not be able to proceed.
Image Description: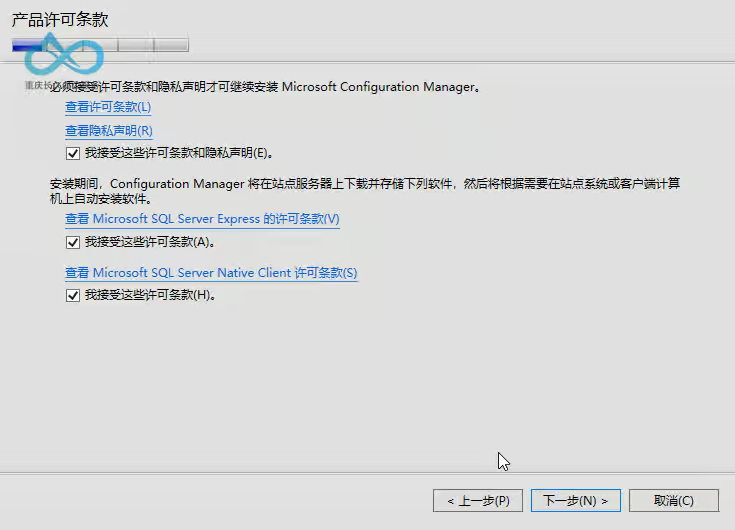
5. Set Installation File Download Path
Select a disk with ample free space, as approximately 1.4GB of files will be downloaded here to store dependency files during the installation process.
Example Path: D:\MCM.
Image Description: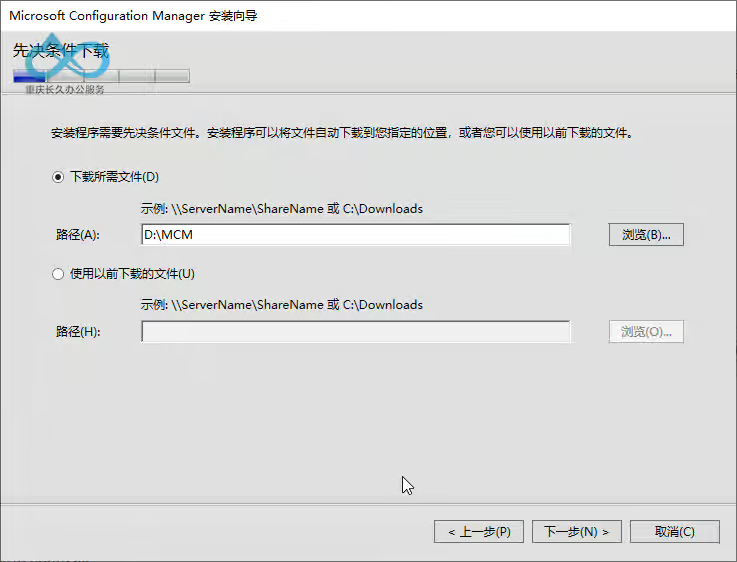
6. Select Language (Default is fine)
The installer will automatically check English (base language) and current system language (e.g., Chinese), no additional adjustments needed.
Note: If other languages are required, language packs can be added through the "Configuration Manager Console" after installation.
Image Description: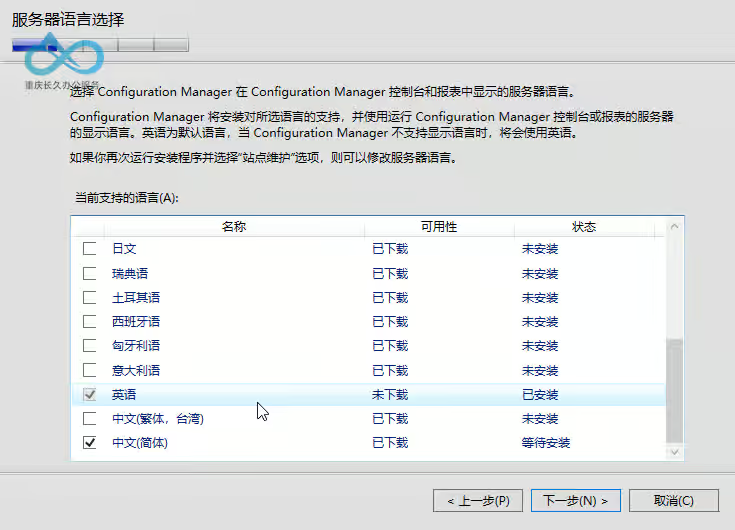
7. Configure Site Information (Key Identifier)
- Site Name: Enter a name (e.g.,
CJJ) to distinguish different sites; - Site Code: Automatically generated (e.g.,
CJJ), no need to modify (ensure uniqueness).
Image Description: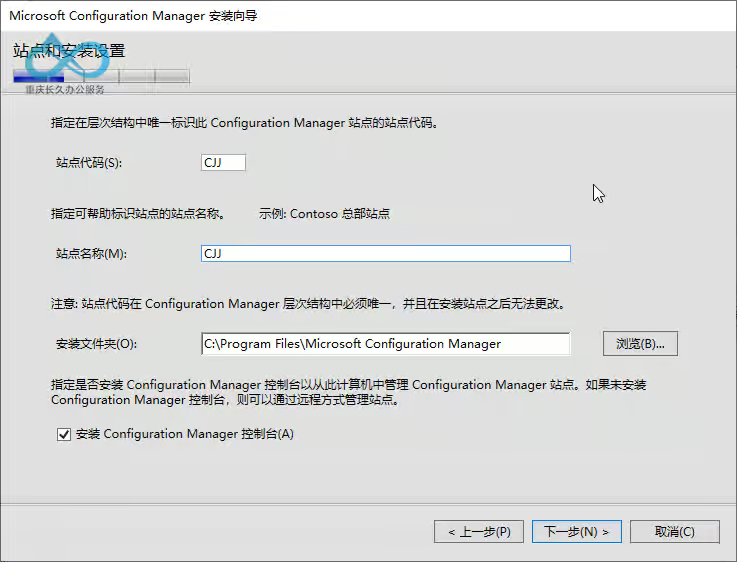
8. Select Site Type: Standalone Primary Site (Must be selected for first installation)
When deploying ConfigMgr for the first time, you must select Install Primary Site as a Standalone Site, which is the most common deployment mode (sub-sites or central administration sites can be added later).
Note: If selecting "Sub-site", the primary site must be deployed first, so the standalone primary site must be selected for the first installation.
Image Description:
9. Database Configuration (Default is fine, unless using a named instance)
- SQL Server Instance: Default uses the "Default Instance" (
MSSQLSERVER), if a named instance was installed previously (e.g.,SQL2019), it needs to be entered manually; - Database Name: Automatically generated (e.g.,
CM_CJJ), no need to modify.
Note: If the database instance is not configured correctly (e.g., collation does not meet requirements), this was resolved in the previous two tutorials, so you can proceed to the next step here.
Image Description: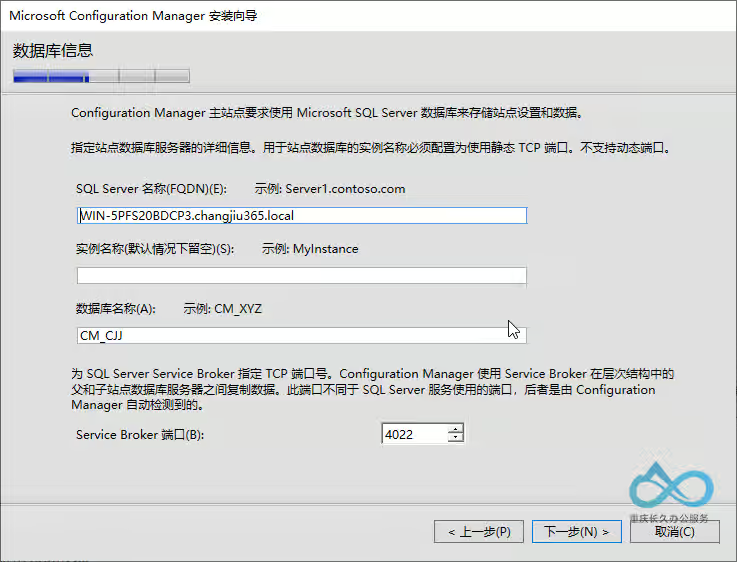
10. Set SQL Data and Log Storage Paths (Default is fine)
The installer will automatically store SQL data files (.mdf) and log files (.ldf) in the default path of SQL Server (e.g., C:\Program Files\Microsoft SQL Server\MSSQL15.MSSQLSERVER\MSSQL\DATA).
Note: If adjustments are needed, click "Browse" to select another path, keep default here.
Image Description: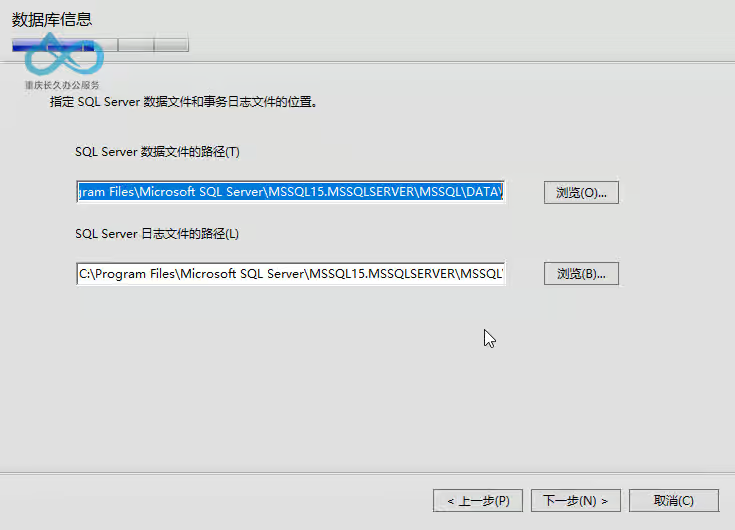
11. Configure SMS Provider (Default is fine)
The SMS provider is the interface between the ConfigMgr console and the database, and is installed by default on the local server (i.e., the server currently deploying ConfigMgr).
Note: If installing the SMS provider on another server, ensure that server meets prerequisites (e.g., .NET Framework 4.8, SQL Server client tools, etc.).
Image Description: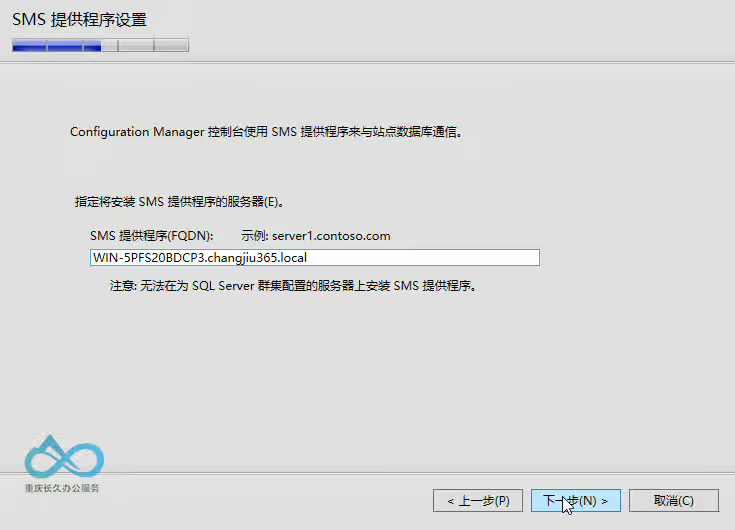
12. Client Communication Settings (Flexible Configuration)
Select Configure communication methods for each site system role (better compatibility), which allows setting different communication protocols (e.g., EHTTP/HTTPS) for different roles (e.g., management point, distribution point).
Note: If selecting "Use EHTTP for client communication", all roles will uniformly use EHTTP, suitable for test environments; if secure communication is required, HTTPS can be configured later.
Image Description: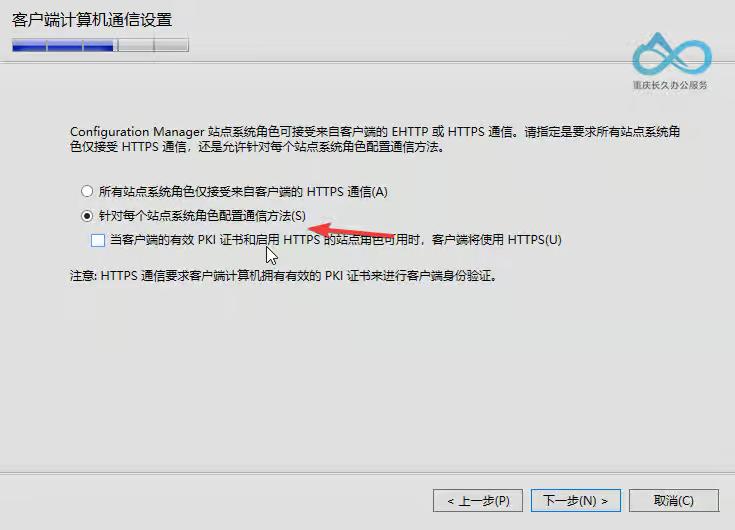
13. Install Site System Roles (Default checks key roles)
The installer will automatically check Management Point and Distribution Point, these two roles are essential for ConfigMgr operation:
- Management Point: Responsible for communication between clients and the site server (e.g., policy delivery, status reporting, etc.);
- Distribution Point: Responsible for storing and distributing packages, updates, etc.
Note: If other roles are required (e.g., software update point, application catalog), they can be added after installation.
Image Description:
![Site Role Selection Interface, default checks "Install Management Point" and "Install Distribution Point"]](assets/image-20250724122252-gt2c111.png "Site Role Installation - Default includes Management Point and Distribution Point")
14. Skip Cloud Service Connection (Temporarily not configured)
Select Temporarily skip connecting to cloud services.
Image Description: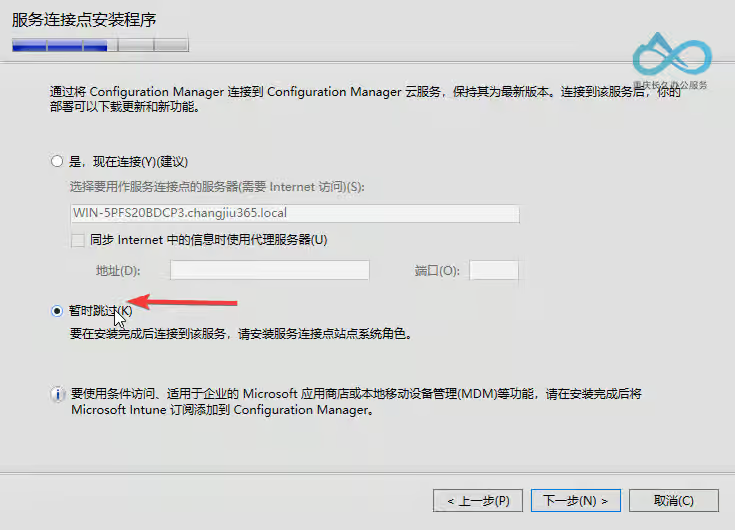
15. Prerequisite Check (Must Pass)
The installer will automatically check all prerequisites (e.g., server roles, database configuration, ODBC driver, etc.), if any fail, return to the previous two tutorials to resolve.
Common Failures:
- Server roles not added (e.g., Web Server, Remote Differential Compression);
- SQL Server collation does not meet requirements (must be
SQL_Latin1_General_CP1_CI_AS); - ODBC driver not installed (need to install SQL Server Native Client 11.0).
Solution: Based on failure prompts, refer to the previous two tutorials to fix one by one, after fixing click "Re-run check", until all items show "Passed".
Image Description: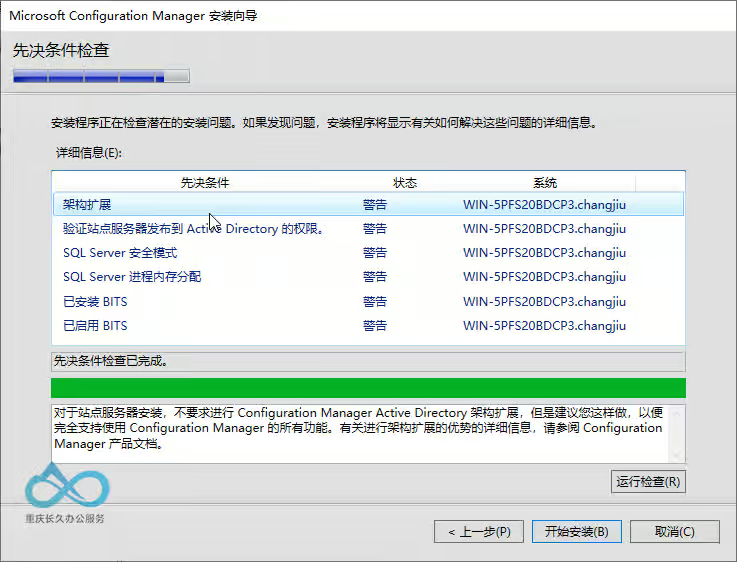
16. Start Installation (Wait for Completion)
After clicking "Start Installation", the installer will begin copying files, configuring the database, installing roles, etc., which takes about 30-60 minutes (depending on server performance).
Note: Do not close the installer or restart the server during installation, as this may cause installation failure.
17. Installation Complete (Verify Success)
When the installer displays "Installation Complete", click "Close", then open the Configuration Manager console to verify the deployment results:
- Open the "Configuration Manager Console", check the site status under "Administration" → "Site Configuration" → "Sites" (should be "Normal");
- View the installation log (path:
SMSSETUP\LOGS\setup.log), confirm there are no error messages.
Image Description: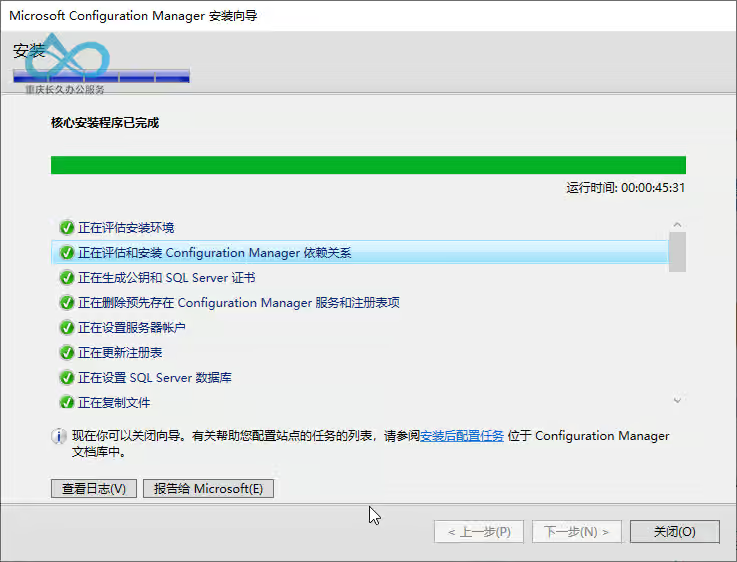
IV. Summary
This article detailed the installation process of the Configuration Manager baseline version, covering every step from obtaining the installation package to verifying the deployment. Through the prerequisite preparation in the previous two tutorials and the installation steps in this article, you have successfully deployed the ConfigMgr primary site. Next, you can start exploring ConfigMgr's core features (such as software deployment, update management, device management, etc.).
If you encounter any issues during installation, you can refer to the previous two tutorials or check the ConfigMgr installation log (SMSSETUP\LOGS), or leave a comment for discussion.
Comment