SQL Server 2019 Installation Guide: Configuration Manager Database Preparation and SSMS Tool Installation
This tutorial series focuses on Configuration Manager installation and configuration, with SQL Server as its core dependency component that needs to be deployed first. Since Configuration Manager requires SQL Server 2022 to run in compatibility mode, we choose to directly install SQL Server 2019 to simplify the process. This article details the installation steps for SQL Server 2019 Developer Edition and management tools (SSMS) to ensure compliance with Configuration Manager requirements.
Note: SQL Server 2019 Developer Edition is authorized only for non-production environments (development/testing). Production environments require Enterprise or Standard Edition.
Preparation
1. System Requirements
- Operating System: Windows Server 2019/2022 or Windows 10/11 (64-bit)
- Hardware: At least 4GB RAM (8GB+ recommended), 10GB available disk space
- Permissions: Administrator privileges (for service installation and system configuration)
2. Download Installation Program
- SQL Server 2019: Obtain the evaluation version installer from Microsoft's official website (Download Link)
Part I: SQL Server 2019 Installation Steps
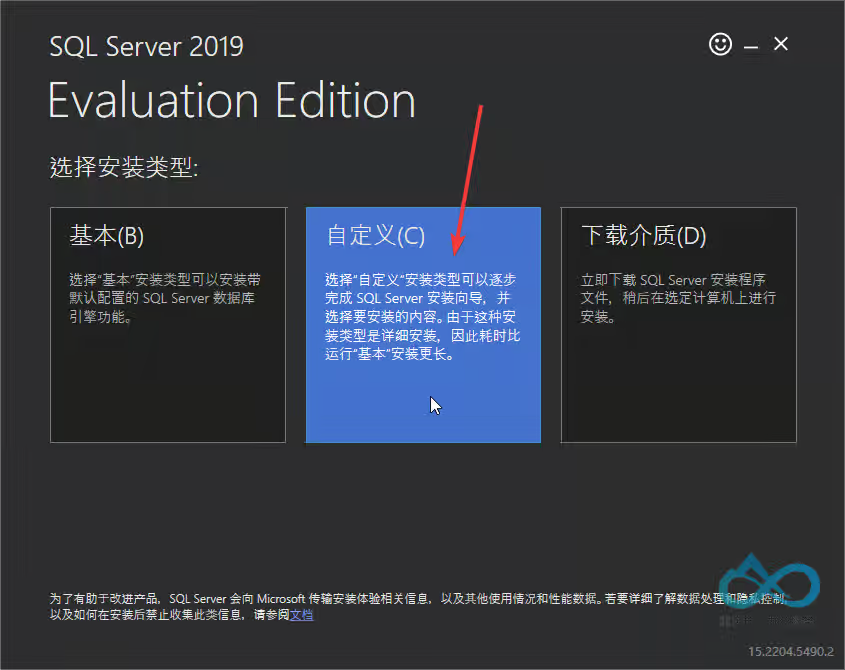
Step 1: Launch Installer and Select "Custom Installation"
- Run the downloaded SQL Server 2019 installer. On the initial screen, select "Custom" installation mode (not "Basic"), then click "Install" to start downloading installation media (wait several minutes depending on network speed).
Reason: Configuration Manager has strict collation requirements for databases. "Basic Installation" cannot customize collation settings, so "Custom" must be selected.
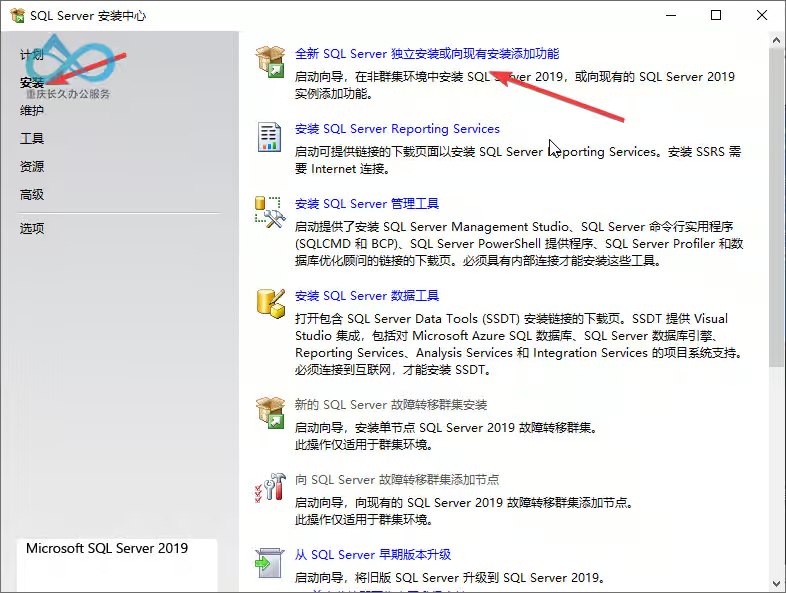
Step 2: Enter Installation Center and Select "New Installation"
After download completes, the Installation Center will appear automatically. Click the left "Installation" tab and select "New SQL Server Standalone Installation or Add Features to Existing Installation".
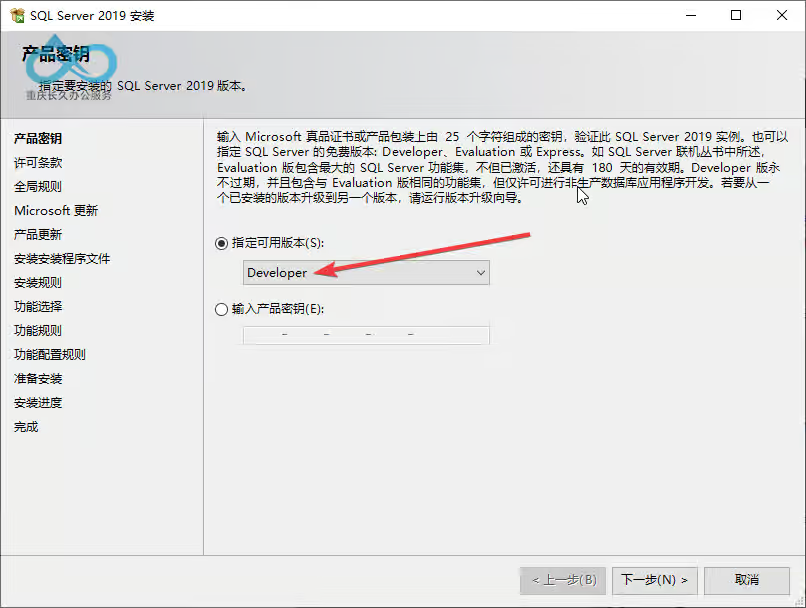
Step 3: Select Version and Accept License Terms
- In the "Product Key" interface, select "Developer Edition" (free for non-production use) and click "Next".
- Check "I accept the license terms" and click "Next".
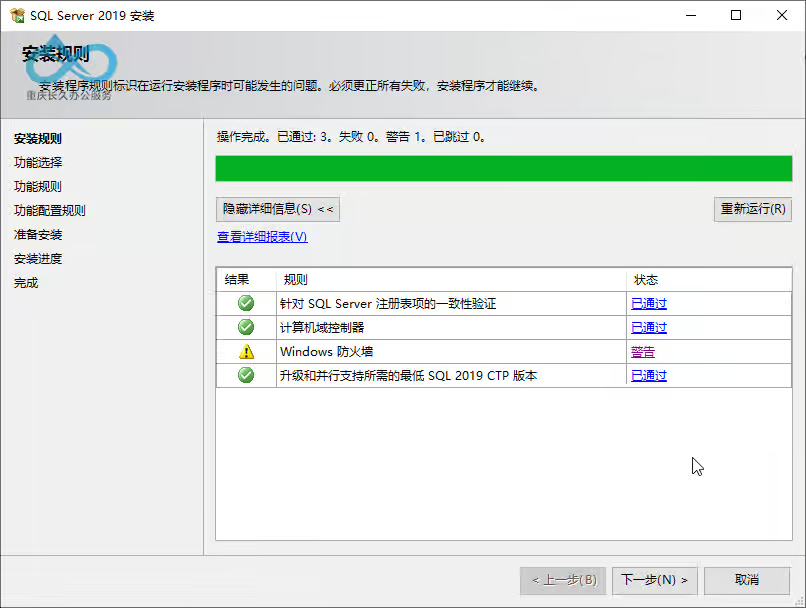
Step 4: Installation Rule Check
The installer will automatically perform "Installation Rule" checks (operating system compatibility, network service status, etc.).
If a "Firewall Warning" appears (when database services aren't externally provided), click "Next" to ignore (manual firewall configuration required later for remote access).
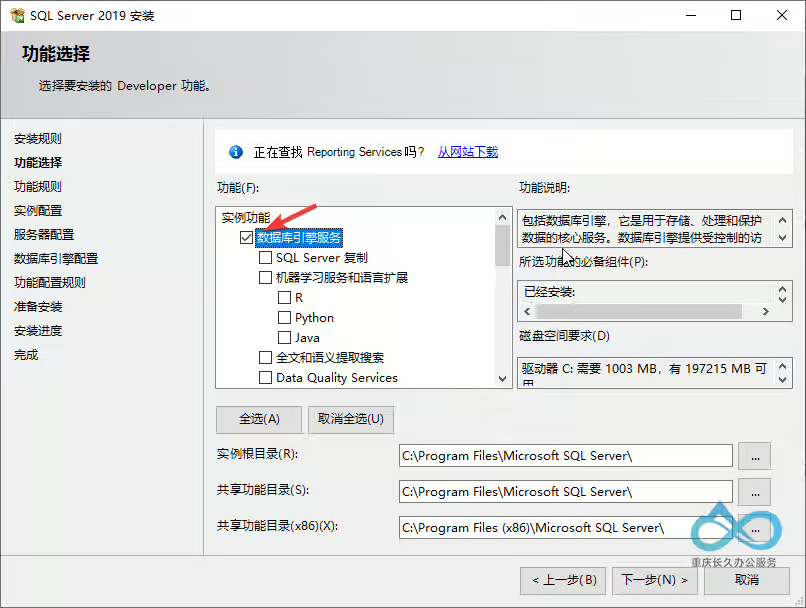
Step 5: Select Features to Install
In the "Feature Selection" interface, only check "Database Engine Services" (Configuration Manager core dependency component). Other features (SQL Server replication, full-text and semantic extraction search, etc.) can be installed as needed. Click "Next".
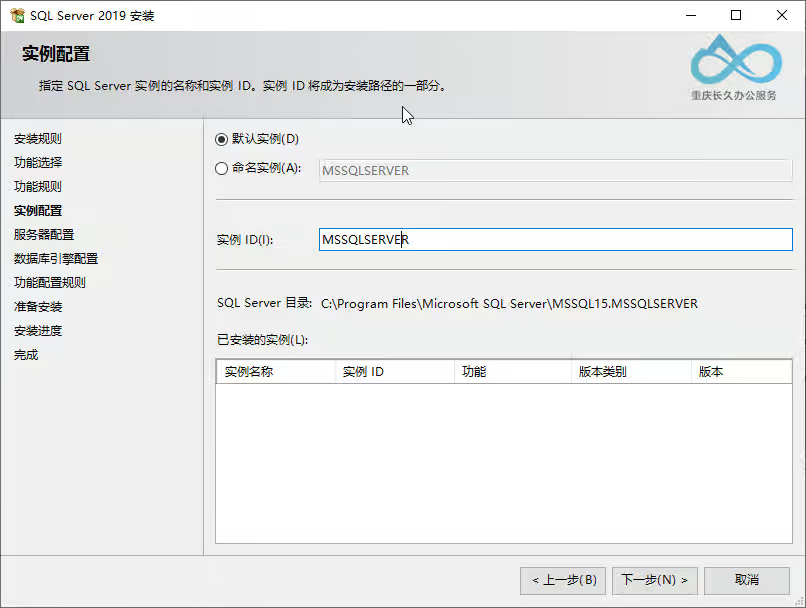
Step 6: Configure Instance
In the "Instance Configuration" interface, select "Default Instance" (recommended, instance name defaults to MSSQLSERVER, simplifying subsequent Configuration Manager automatic recognition). Click "Next".
Note: If installing a named instance, record the instance name for manual specification during Configuration Manager configuration.
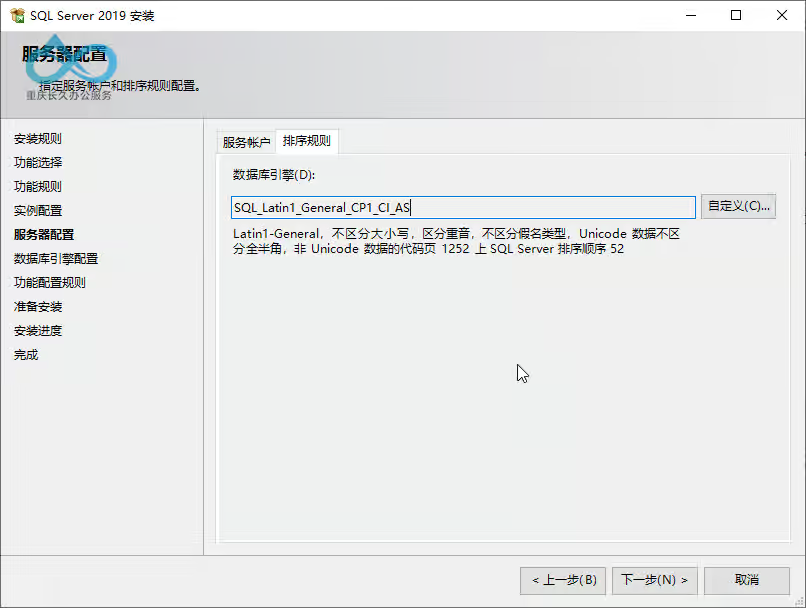
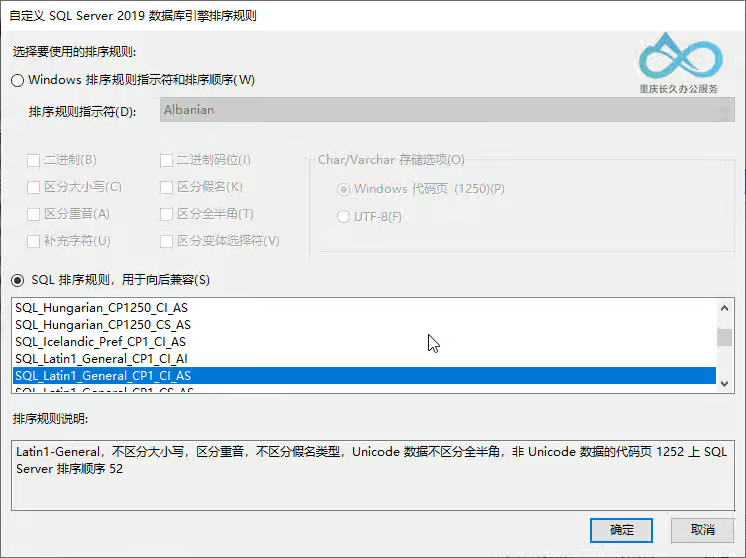
Step 7: Configure Collation
In the "Database Engine Configuration" interface, must set collation to SQL_Latin1_General_CP1_CI_AS (Configuration Manager mandatory requirement, do not modify to other collations). Click "Next".
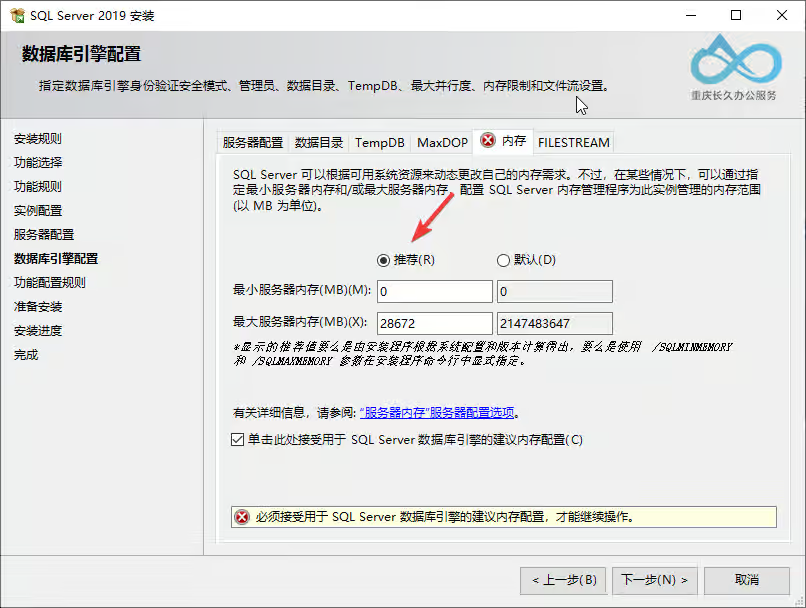
Step 8: Add Administrator Account and Configure Memory
- In the "Database Engine Configuration" > "Authentication Mode" tab, click "Add Current User" to add the login user as a SQL Server administrator (facilitates subsequent database management).

- Switch to the "Memory" tab, check "Use recommended memory settings" (prevents SQL Server from unlimited memory consumption causing server performance degradation). Click "Next".
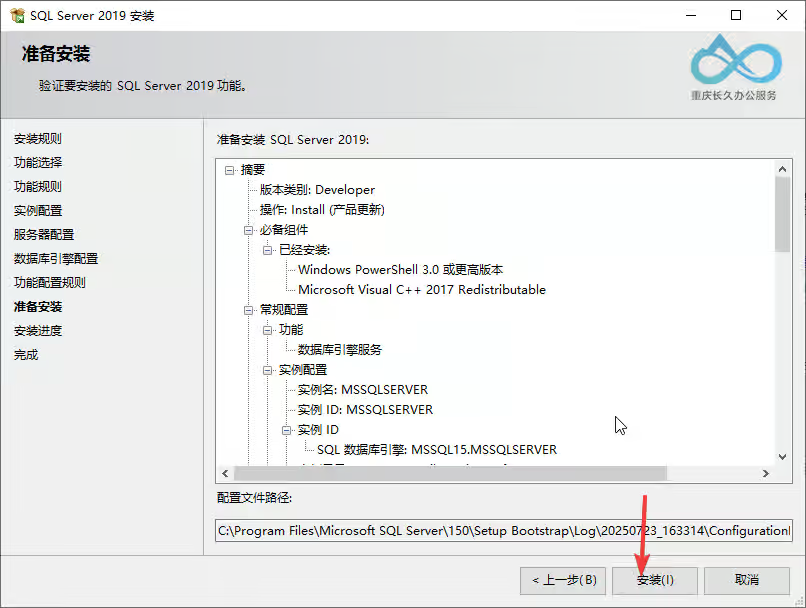
Step 9: Complete Installation
After confirming all configurations, click "Install" to start deploying SQL Server 2019. Wait for installation completion (approximately 5-10 minutes depending on hardware performance).
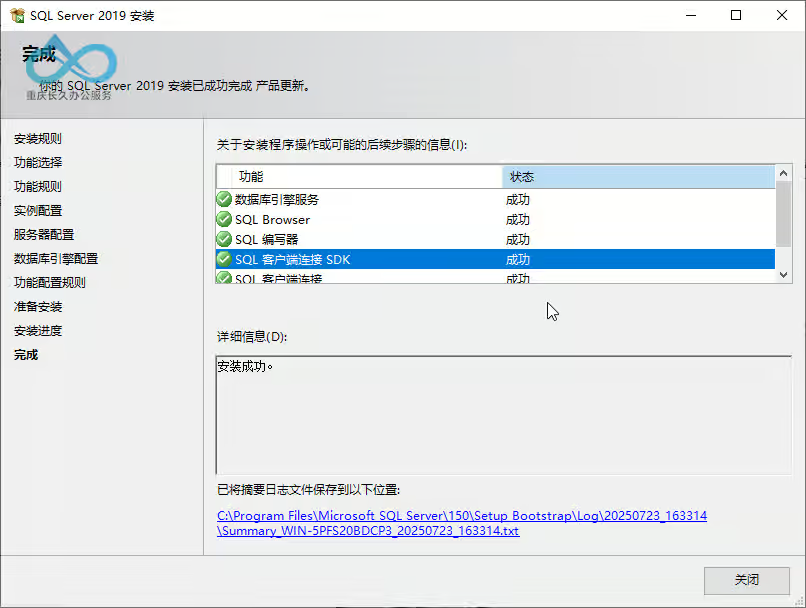
When the "Installation Successful" prompt appears, click "Close".
Part II: SQL Server Management Tools (SSMS) Installation
To manage SQL Server databases, install SQL Server Management Studio (SSMS).
Step 1: Download SSMS
- Return to SQL Server Installation Center, click the left "Installation" tab, select "Install SQL Server Management Tools", which automatically redirects to Microsoft's download page.
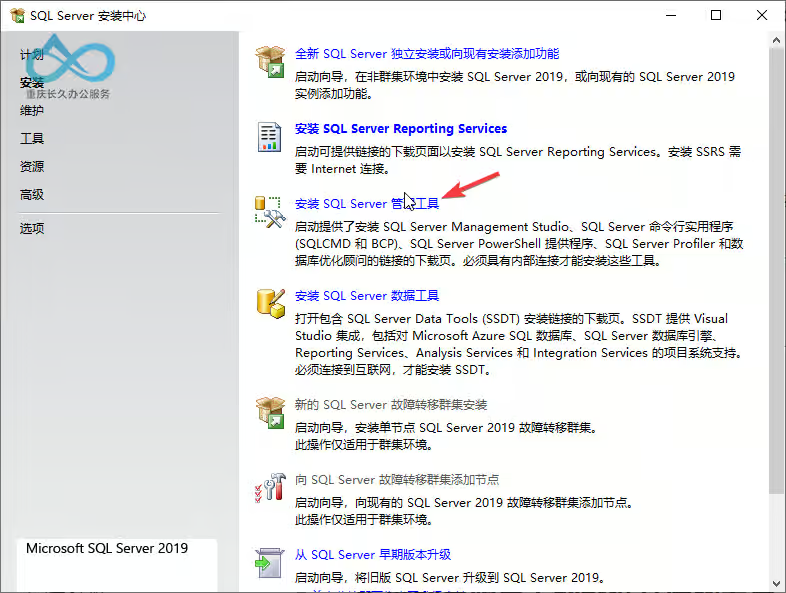
Alternatively, directly visit SSMS Download Page to download SSMS 21.

Step 2: Install SSMS
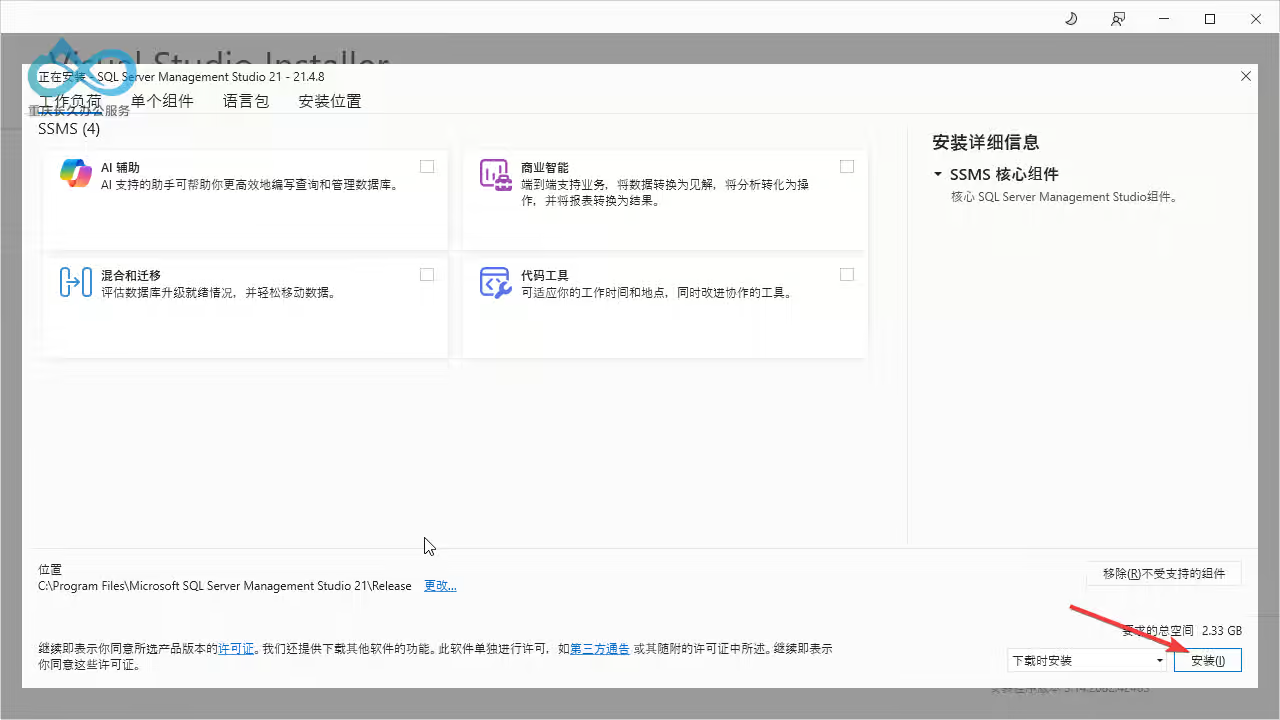
- Run the downloaded SSMS installer. Click "Continue" (default installation path recommended, or customize as needed).
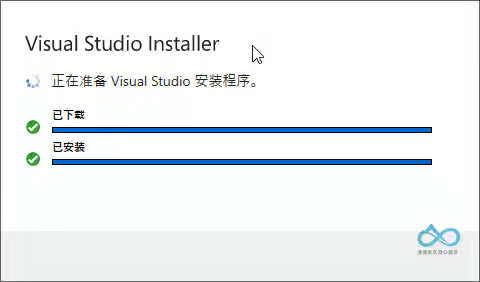
- Wait for file extraction and automatic installation. Click "Close" after completion.

Installation Verification
- Open SSMS (search "SQL Server Management Studio" in Start menu)
- In the "Connect to Server" window, enter
localhostfor server name (default instance), select "Windows Authentication", click "Connect". - If successfully connected to the database engine, SQL Server 2019 and SSMS installation are complete.
Important Notes
- Version Limitations: Developer Edition is for development/testing only. Production environments require licensed Enterprise/Standard Edition.
- Collation:
SQL_Latin1_General_CP1_CI_ASis mandatory for Configuration Manager. Reinstallation is required if incorrectly configured. - Memory Settings: Always check "Recommended memory settings" to prevent SQL Server from consuming over 80% system memory.
- Firewall: For remote database access, allow SQL Server default port (1433) or instance-specific port in firewall.
Next Steps
After completing SQL Server 2019 and SSMS installation, the next tutorial will cover Configuration Manager pre-configuration (database permissions, component installation, etc.).

Comment