Comprehensive Guide to Installing and Configuring WSUS on Windows Server 2025
Windows Server Update Services (WSUS) enables administrators to centrally manage and distribute Windows updates. This tutorial will guide you through the installation, configuration, and initial synchronization processes for WSUS on Windows Server 2025.
Prerequisites
- Windows Server 2025 Standard or Datacenter Edition
- Minimum 4GB RAM (8GB+ recommended)
- 100GB+ disk space (for storing updates)
- Administrator-level account
- Stable network connection
Installation Steps
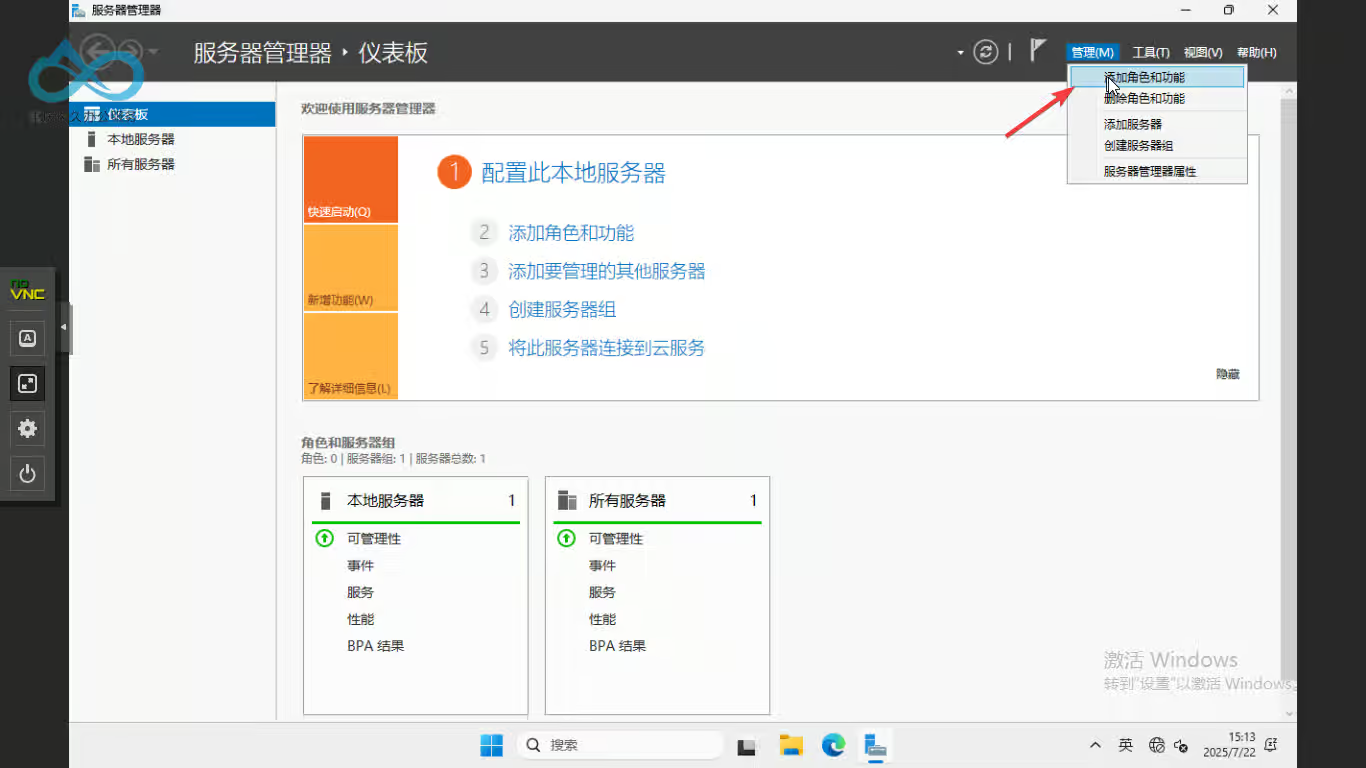
1. Install the WSUS Role

2. Launch Post-Installation Configuration
Run the configuration wizard immediately after installation completes: 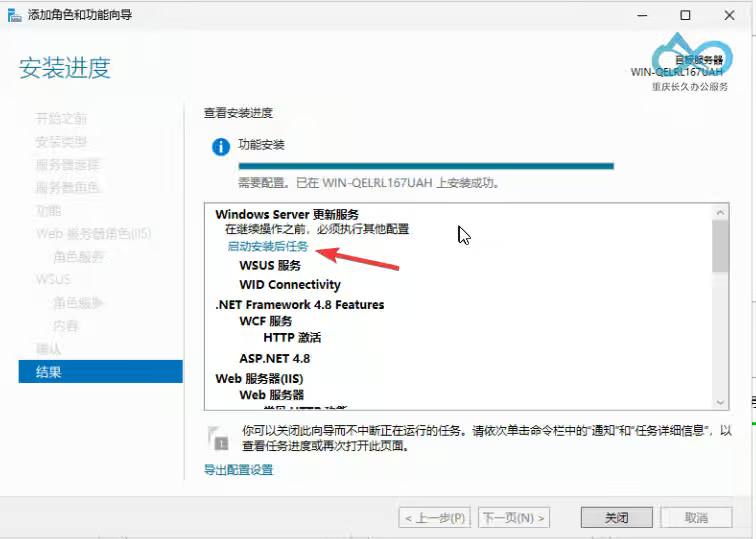
3. Initialize the WSUS Console
Open the Windows Server Update Services management console: 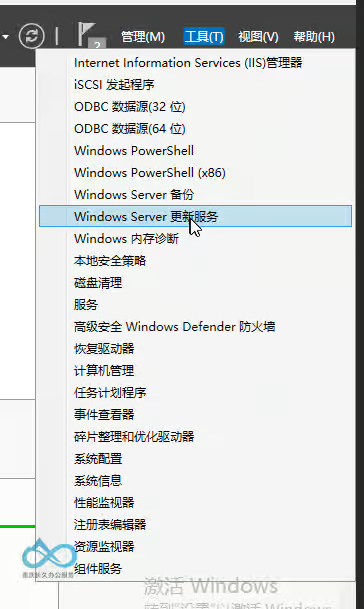
Configuration Guide
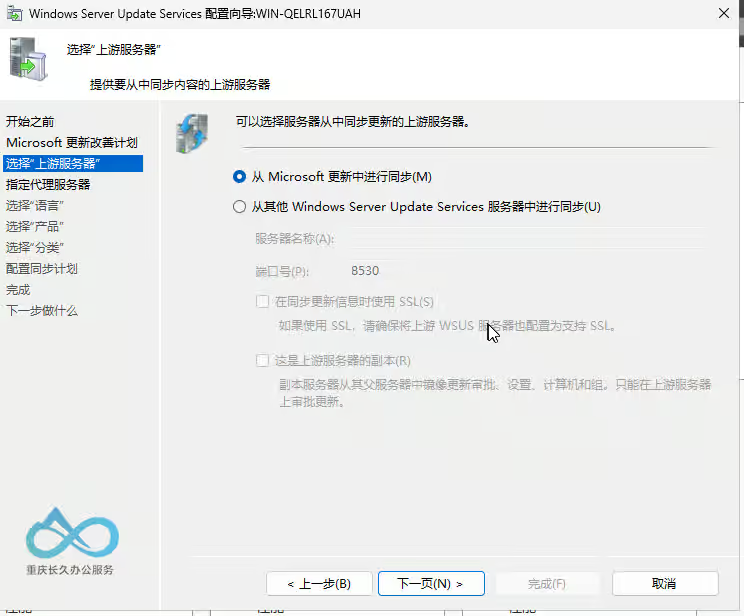
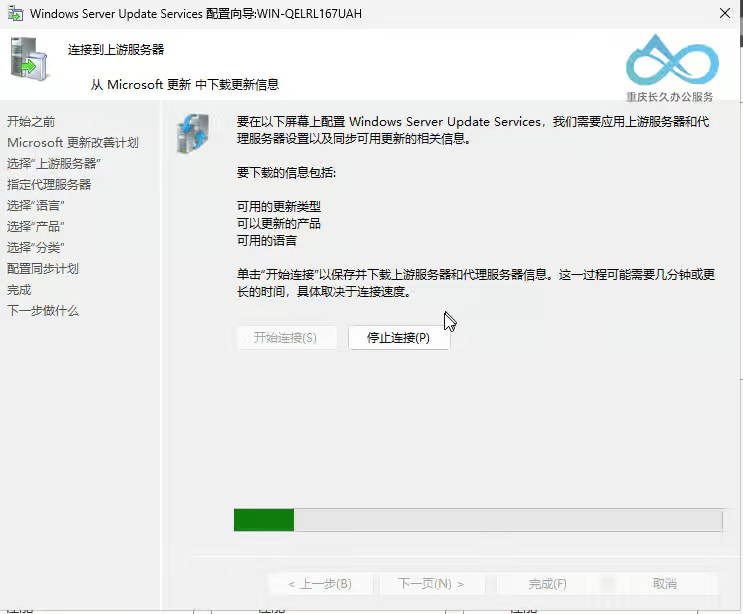
4. Set the Synchronization Source
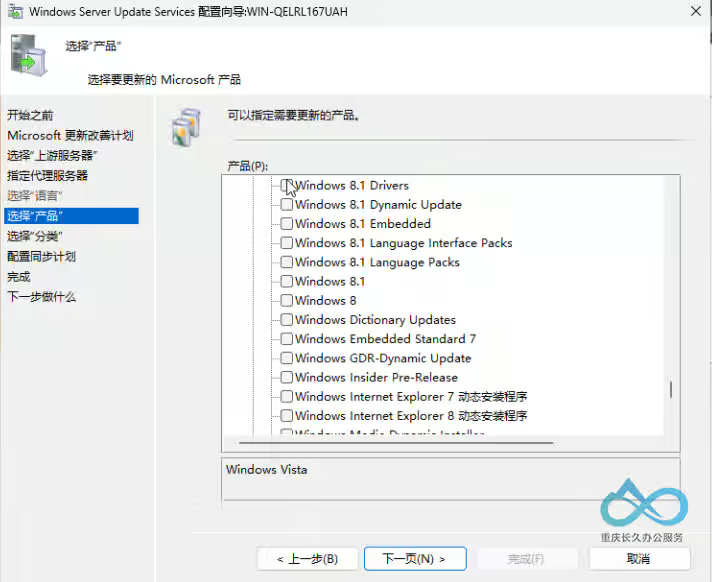
5. Filter Product Updates
Since I am not enabling local storage, I skipped the language selection step.
Recommendation: Uncheck outdated systems no longer supported:
- Windows 8
- Windows Server 2008
- Office 2010 and earlier versions
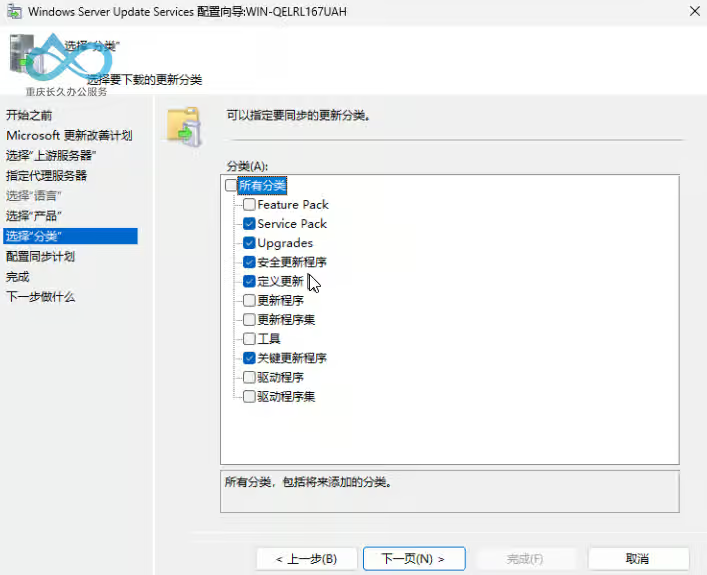
6. Select Update Classifications
Choose classifications based on your requirements. Typical configuration:
✅ Service Packs
✅ Security updates (Monthly Patch Releases)
✅ Definition Updates (Antivirus Signature Updates for Defender)
✅ Critical Updates
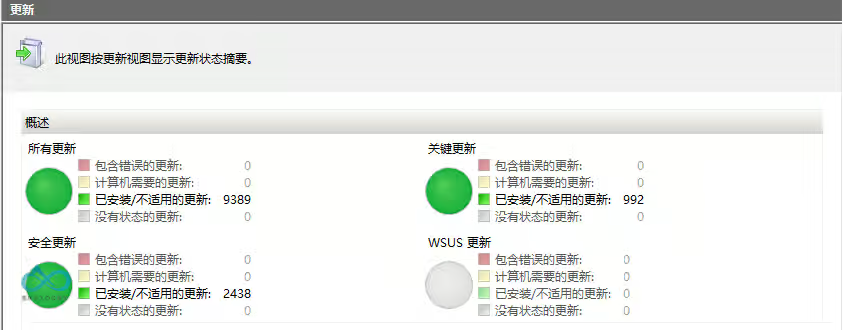
Initial Synchronization
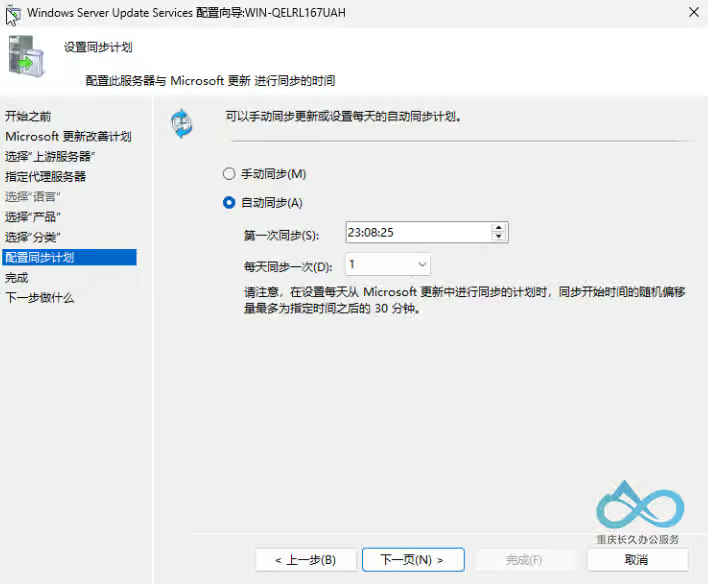
7. Start the Initial Synchronization
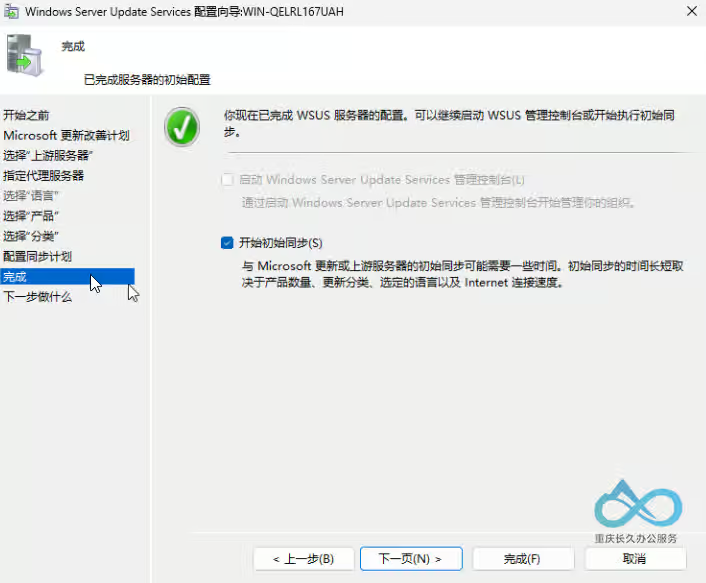
8. Wait for Synchronization to Complete
Time Estimate:
⏱️ First synchronization may take 2–8 hours (depending on network bandwidth)
💡 Recommend running this during off-peak hours
Troubleshooting
| Problem | Solution |
|---|---|
| Synchronization stalls | Restart the Update Services service |
| Insufficient disk space | Change WSUS content storage path |
| Clients cannot connect | Check firewall rules (TCP ports 8530/8531) |
Note: After synchronization completes, configure Group Policy to direct client computers to the WSUS server.

Comment